|
Modelling in Renx
Welcome to my tutorial for using RenX
to model BFME. I decided to write this, mainly because so
many people want to model, and for some reason don’t
understand the oldfaq one… the guide I used when I started
can be found here:
http://www.artistrygamers.com/nickselvesmod/inftut.zip
inftut.zip
To start off with you’ll need a copy of
Gmax, RenX, and a w3d importer. I'll be using the ones
located on this site:
http://the3rdage.net/tools.php so you might want to get
yours from there, so you’ll know what I’m on about. (The w3d
is by Coolfile, and I hope Hostile doesn’t mind me linking
to his site...)
Now that we have everything working, we
need to first import our w3d file. (This guide assumes you
have extracted the files you want to use from w3d.big and
textures. big)
Use the w3d importer to do it.
- Click Customize
- Click Customize User Interface
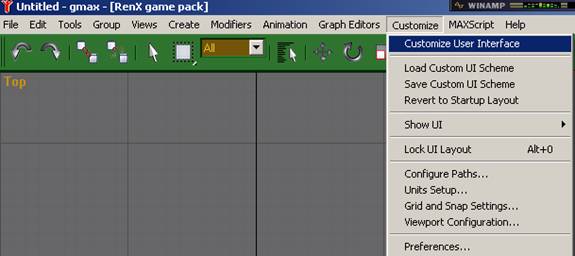
- Select Group: Main UI, Category: All
Commands, and find ‘Coolfile W3D Importer’.
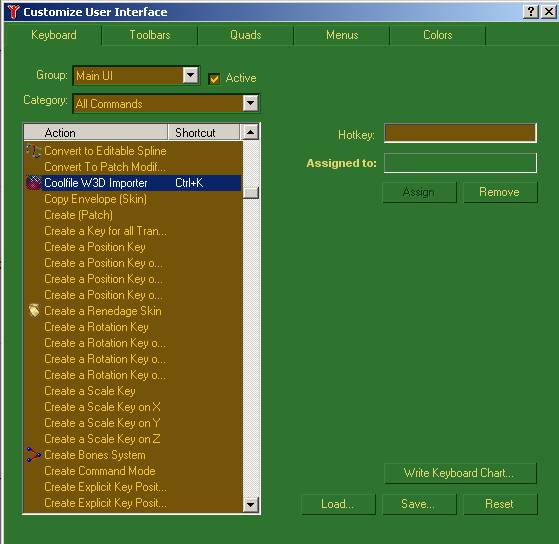
- Click on Hotkey, and assign it a
button. I use Ctrl – K.
Close this window and you should be
left where you started. Now you can use your hotkey to open
a w3d file. So press the hotkey, and navigate in the new
window to your w3d files. For infantry, you will need to
edit the _skn files, for others, you will just have to work
it out. (In this tutorial I will edit the Gondor Man at
Arms)
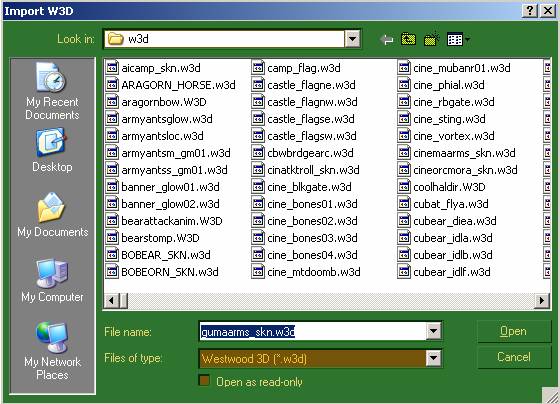
Click Open.
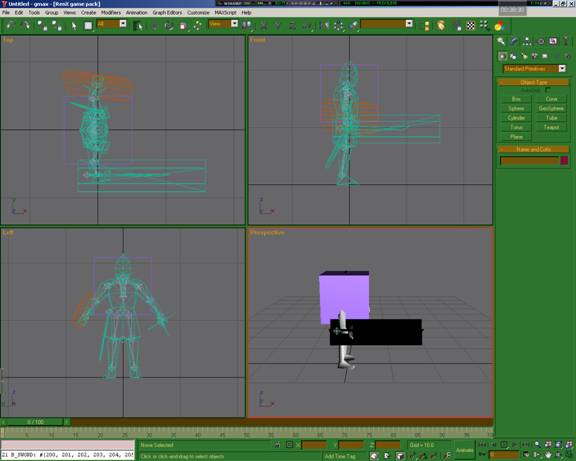
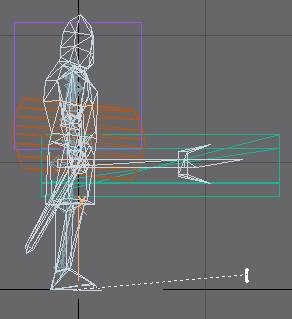
Now you should be back to the main
screen, but there should be things in each window. Zoom in
on everything by pressing this button

Normally it is located at the bottom.
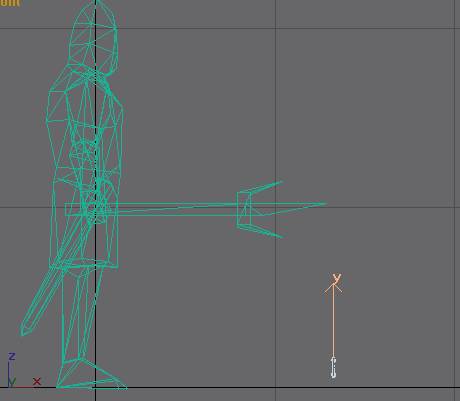
You should now have something that looks like this:
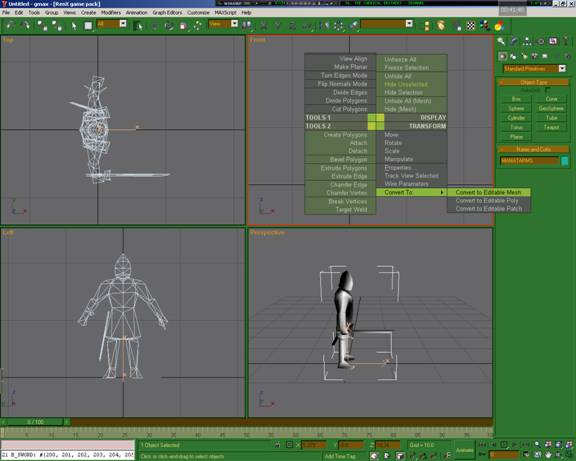
Now, we only want to edit the model, so
lets hide the other bits, by left clicking on the model, and
pressing ‘Hide Unselected’.

Now right click on the same mesh, and
click ‘convert To: Editable Mesh’
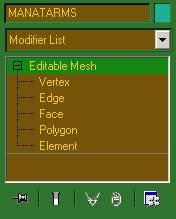
Expand the new menu on the right hand
side called ‘Editable Mesh’ and select Vertex.
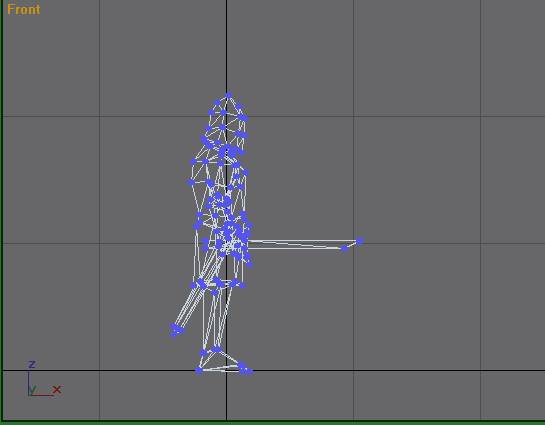
You can now do what ever you want to
make your model different, using the buttons at the top:

In order they are move, rotate and
scale. After editing my model I got:

Now we have edited our model we need to
apply the skin. Press ‘m’.
Press this button:

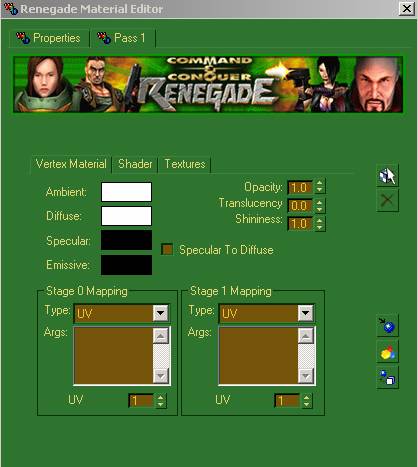
If it changes tabs, go back to Pass 1,
Vertex Material. Now change these colours
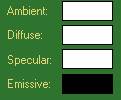
So that:
Ambient is White
Diffuse is White
Specular is Black
Emissive is Black
Press the textures tab.
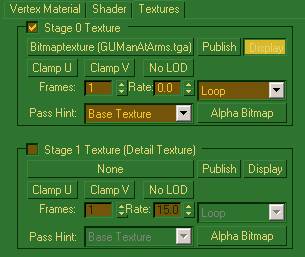
Where it says Bitmap Texture
(GUManAtArms.tga) you can choose which texture to use, but
dds files won’t work. Choose the skin, and then press this
button:
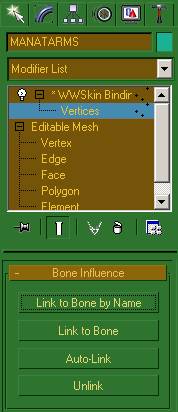
Next you have to bind all the vertices
to bones. This is considered the hard bit, but is more time
consuming than hard. Press these buttons in this order:

Now click anywhere on your RenX scene,
preferably far away from your mode, but still in view. The
thing you have just made is called a WWSkin.
.
Now right click on the scene, and
unhide all. Then click ‘Add Bones’ from the menu on the
right. (You may have to click on the WWSkin again to make
the button come up).
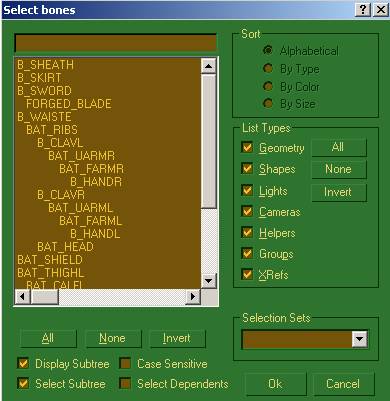
Check the ‘Display Subtree’, and
‘Select Subtree’ buttons. Now from the list, choose all the
bones you want use, normally the only ones you don’t want to
use are things like ‘BOUNDINGBOX’, ‘WWSkin’ etc.. Click OK.
Now press this button:

It will be located at the top.
You then have to drag it from the mesh
to the WWSkin.
Press the mouse cursor button.

Expand the WWSkin Binding Menu and
select ‘Vertices’.
Now all you have to do is select the
vertices (blue dots) closest the bones (light blue/ grey
squares) and link them. This is how to do it.
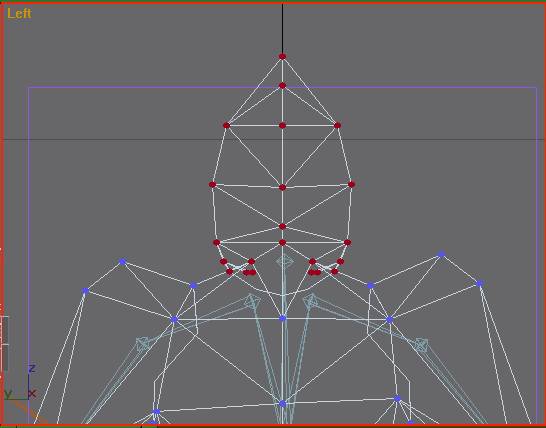
Select all the vertices closest to a
bone, ill start with the head. Now click ‘Link to bone by
name’, and select B_head, or Bat_Head, and press ok. (It can
vary).

Now just repeat this for all the bones.
If you don’t know what a bone is called, you can click on
the WWSkin Binding menu, and you can then click on a bone to
see what it is called, it will tell you just above where
this menu is.

Once you have done this, you may have
to repeat the whole process from the Create WWSkin phase,
linking it other objects like shields.
Once you have done all this (and it may
take a while) click the hammer tab, and then ‘W3D Tools’

Now you have to choose export settings
for each item by clicking on it, and choosing the settings.
Here are the settings for most things:
Meshes (The actual model): Only ‘Export
Geometry’
Bounding Boxes (big opaque boxes):
Export Transform, Export Geometry, AABox
Forged Blade/other effects: Export
Transform, Export Geometry, 2 Side, Normal
Arrows: Export Transform, Export
Geometry, 2 Side, Normal
Now we are ready to export the model.
Click File > Export.
Choose your w3d folder, and save as
type w3d.click ok.

YOU MUST CHOOSE ‘Hierarchical Model;
and in most cases ‘Export using Existing Skeleton’. You must
then browse to the skeleton (if the model was random_skn,
then the skeleton will be random_skl). Click OK.
Well done. You have made your model!
Now all you need to do is add a reference to it in the ini’s,
and add it to the asset.dat. Plenty of ways to do that
though. Good Luck with the modeling!!
|